
Plaits, an ancient art form, offer versatile styling and cultural significance, evolving from practical hair management to elaborate expressions.
Beginner guides and resources, like books and YouTube tutorials, demonstrate foundational techniques, such as the three-strand braid.
Mastering these skills unlocks a world of creativity, from simple everyday styles to intricate cornrows and box braids.
What are Plaits and Their Historical Significance?
Plaits, commonly known as braids, are interwoven strands of hair, a hairstyle practiced across cultures for millennia. Historically, braiding wasn’t merely aesthetic; it served functional purposes, keeping hair contained during work or battle.
Evidence suggests braiding dates back to ancient civilizations – Africa, where intricate patterns signified tribal affiliation, status, and even religious beliefs. In other cultures, braids denoted marital status or age.
Throughout history, plaits have symbolized artistry and social identity. The complexity of a braid often reflected the weaver’s skill and the wearer’s position within the community. Today, braiding continues to evolve, blending tradition with modern styles, remaining a powerful form of self-expression.
Benefits of Learning to Plait
Learning to plait offers a multitude of benefits, extending beyond simply styling hair. Mastering braiding techniques fosters creativity and provides a rewarding, self-sufficient skill. It’s a cost-effective alternative to salon visits, empowering individuals to manage their hair independently.
Braiding can promote hair health by reducing breakage and tangling, particularly beneficial for textured hair. It’s a versatile skill applicable to various hair lengths and types, opening doors to diverse hairstyles for any occasion.
Furthermore, braiding can be a meditative and relaxing activity, offering a creative outlet. It’s a skill easily shared with friends and family, strengthening bonds through a fun, practical exchange.

Essential Tools and Preparation
Successful braiding requires the right tools: combs, brushes, hair ties, and potentially braiding hair. Proper preparation—washing, conditioning, and detangling—is crucial for smooth results.
Hair Types Suitable for Braiding
Virtually all hair types can be braided, though certain textures lend themselves more easily to specific styles. Straighter hair often benefits from texturizing products or slightly damp conditions to improve grip and prevent slippage during the braiding process.
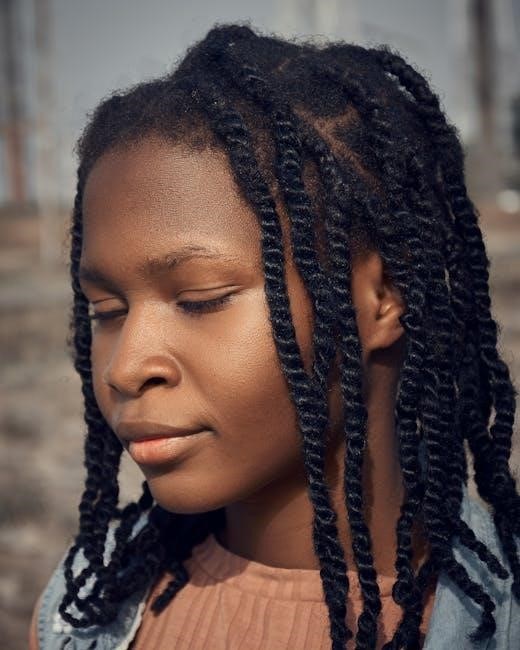
Coarser, kinkier, and curly hair textures generally provide ample grip, making them ideal for a wide range of braids, including cornrows, box braids, and intricate designs. However, even very fine or delicate hair can be braided with care, utilizing gentle techniques and appropriate products to minimize breakage.
Hair length also plays a role; longer hair offers more versatility in styling, while shorter layers may require different approaches to achieve desired looks. Ultimately, successful braiding depends more on technique and preparation than inherent hair type.
Necessary Tools: Combs, Brushes, Hair Ties, and More
Essential tools for braiding include a wide-tooth comb for detangling, a rat-tail comb for precise sectioning, and various brushes – paddle, round, or boar bristle – for smoothing. Hair ties (elastic or fabric) secure braids at the ends, while bobby pins offer additional hold for intricate styles.
Spray bottles filled with water are crucial for maintaining moisture and manageability. Sectioning clips keep strands separated during the braiding process. For more complex braids like cornrows, a styling gel or edge control provides definition and reduces frizz.
Scissors are useful for trimming stray hairs, and a mirror is essential for checking the back of your work. Protective gear like gloves can also be helpful.
Preparing Hair for Braiding: Washing, Conditioning, and Detangling
Proper preparation is key for successful braiding. Begin with a thorough wash using a clarifying shampoo to remove buildup, followed by a deep conditioning treatment to restore moisture and elasticity. This ensures the hair is healthy and less prone to breakage during the braiding process.
Detangling is crucial; start from the ends and work your way up using a wide-tooth comb or detangling brush. Sectioning the hair while detangling prevents frustration and minimizes breakage. Applying a leave-in conditioner or detangling spray can further ease the process.
Ensure hair is completely dry before braiding to prevent mildew and maintain braid integrity.

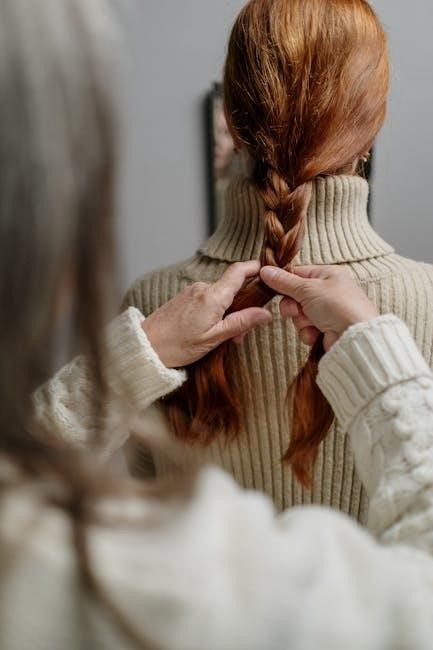
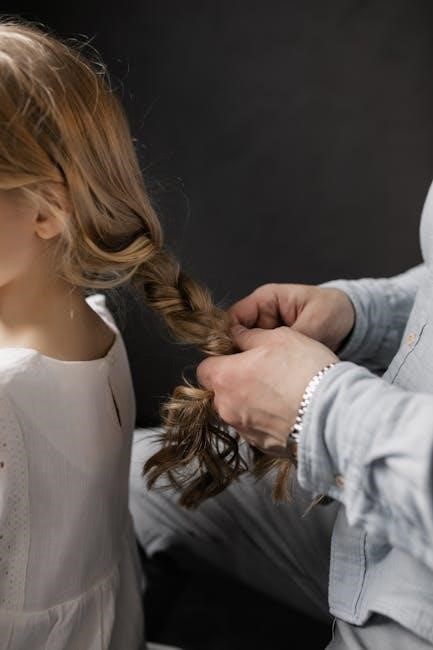
Mastering the Basic Three-Strand Plait
The three-strand plait is the foundation of many braiding styles, offering a simple yet versatile technique for beginners to learn and perfect.
Step-by-step tutorials readily available online and in books guide you through each movement.
Step-by-Step Guide to the Three-Strand Plait
Begin with detangled hair, divided into three equal sections. Label them left, middle, and right for clarity. Step one: Cross the right section over the middle section, making the original right section now the new middle.
Step two: Repeat this process with the left section, crossing it over the new middle section (which was previously the right). Continue alternating sides.
Step three: Consistently cross the outer sections over the middle, maintaining tension for a neat appearance. As you braid, keep the sections relatively taut but not overly tight.
Step four: Continue braiding until you reach the end of your hair. Secure the plait with a hair tie. Practice makes perfect; don’t be discouraged by initial attempts!
Tip: Use a mirror to check your work and ensure even braiding.
Common Mistakes and How to Avoid Them
Uneven sections are a frequent issue; ensure each strand is roughly equal in size before starting. Loose braiding results in a sloppy appearance – maintain consistent tension throughout the process. Dropping strands happens easily; concentrate and keep a firm grip.
Braid too tightly can cause discomfort and breakage; aim for snug, not painful. Inconsistent crossing leads to asymmetry; practice smooth, even movements. Frizzy ends can be tamed with a light hair serum before braiding.
Not detangling properly creates knots and snags; thoroughly brush hair beforehand. Using dull hair ties can cause breakage; opt for smooth, fabric-covered ties.
Practice slowly and use a mirror to identify and correct mistakes as you go.
Exploring Different Plaiting Techniques
Beyond the basic three-strand plait, discover French, Dutch, and fishtail braids, each offering unique aesthetics and challenges for aspiring braiders.
These techniques build upon foundational skills, introducing variations in strand manipulation and pattern creation.
French Plait: A Detailed Tutorial
The French plait, a classic and elegant style, begins similarly to a three-strand plait but incorporates adding hair with each cross-over.
Start with a section of hair at the crown, dividing it into three equal strands. Begin a regular three-strand plait for the first two crosses.
Now, before crossing the right strand over the middle, pick up a small section of hair from the right side of the head and add it to the right strand.
Then, cross the combined strand over the middle. Repeat this process on the left side – pick up a section of hair, add it to the left strand, and cross over the middle.
Continue adding hair from alternating sides with each cross-over, working your way down the head. Maintain even tension for a neat and secure plait.
Once all the hair is incorporated, finish with a regular three-strand plait to the ends. Secure with a hair tie.
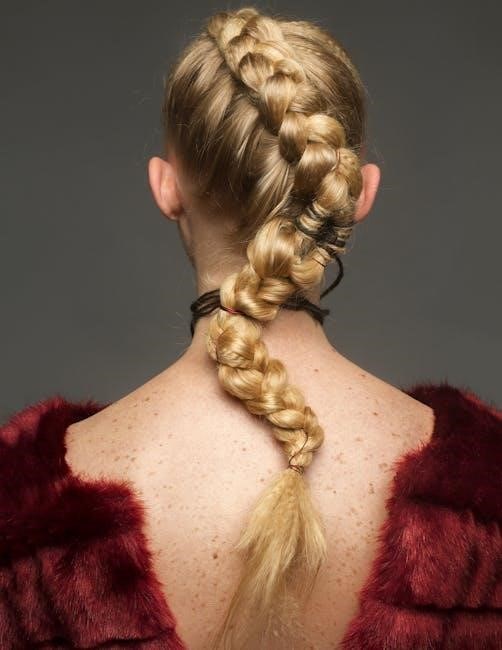
Dutch Plait (Reverse French Plait): A Step-by-Step Guide
The Dutch plait, often called a reverse French plait, creates a raised braid effect, appearing to sit on top of the hair rather than woven within it.
Begin as with a French plait: section hair at the crown and divide into three strands; However, instead of crossing strands over the middle, cross them under.
Pick up a small section of hair from the right side, add it to the right strand, and cross it under the middle strand; Repeat on the left side, adding hair and crossing under.
Continue this process, consistently adding hair and crossing under with each strand, working down the head. Maintaining consistent tension is crucial for a defined look.
The key difference is the underhand crossing, which pushes the braid forward, creating its signature raised appearance. Finish with a standard three-strand plait and secure.
Practice makes perfect – this technique requires coordination, but yields a stunning result!
Fishtail Plait: Creating a Unique Look
The fishtail plait, despite its name, doesn’t involve braiding in the traditional sense; it’s a two-strand technique offering a textured, intricate appearance.
Divide the hair into two equal sections. Take a small strand from the outside of the right section and cross it over to join the left section.
Next, take a small strand from the outside of the left section and cross it over to join the right section. Repeat this process, alternating sides.
The smaller the strands taken, the more detailed and intricate the fishtail will appear. Maintaining even tension is vital for a symmetrical braid.
This technique can be adapted for ponytails, side braids, or even incorporated into updos. It’s a versatile style suitable for various hair lengths and textures.
Practice will refine your technique, resulting in a beautiful, unique fishtail plait!
Advanced Plaiting Styles
Beyond basics, explore cornrows, box braids, and waterfall plaits – demanding precision and patience, these styles showcase artistry and skill.
Detailed tutorials and practice are key to mastering these complex and visually stunning braided creations.
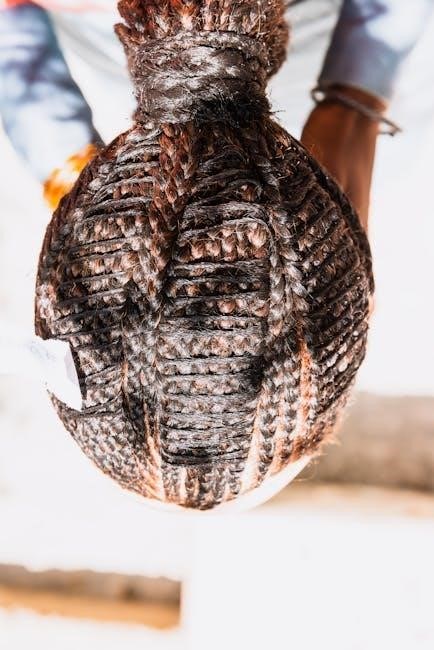
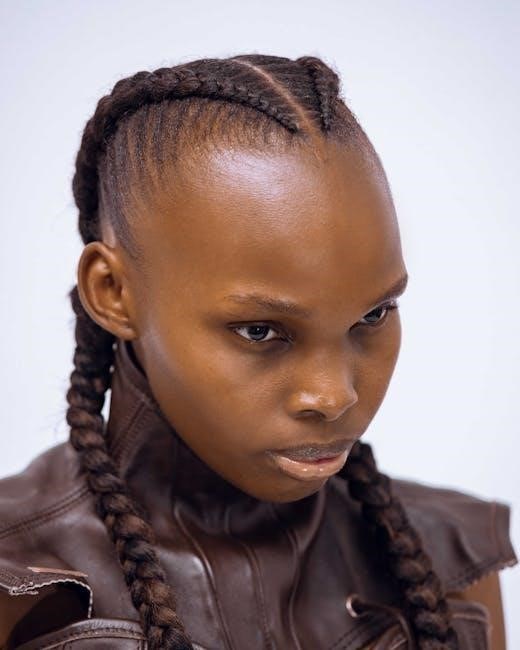
Cornrows: Techniques and Patterns
Cornrows, a traditional African braiding style, involve braiding hair close to the scalp, creating continuous, raised rows. Mastering this technique requires practice and a firm grip.
Begin with sectioning hair into clean, even rows using a comb. Start a three-strand braid, incorporating hair from the scalp with each stitch, feeding in small sections to maintain closeness.
Consistent tension is crucial for neat, defined cornrows. Patterns range from simple straight-backs to intricate geometric designs and curves.
Experiment with different row widths and angles to create unique looks; Resources demonstrate various patterns, including curved, zigzag, and fishtail cornrow variations.
Proper scalp care and moisturizing are essential to prevent dryness and breakage while wearing cornrows.
Box Braids: A Comprehensive Guide
Box braids are a protective style created by dividing the hair into square or box-shaped sections, then braiding each section individually, often with added synthetic hair for length and volume.
Preparation involves thoroughly washing, conditioning, and stretching the natural hair. Sectioning is key – consistent square parts create a uniform look. Begin a three-strand braid, incorporating the extension hair gradually.
Maintaining consistent tension throughout the braid is vital for longevity and comfort. The amount of extension hair used impacts braid thickness and weight.
Box braids offer versatility in styling; they can be worn down, in updos, or adorned with accessories. Proper maintenance, including scalp oiling and wrapping at night, extends their lifespan.
Removal requires patience to avoid damage; gently unravel each braid, detangling as you go.
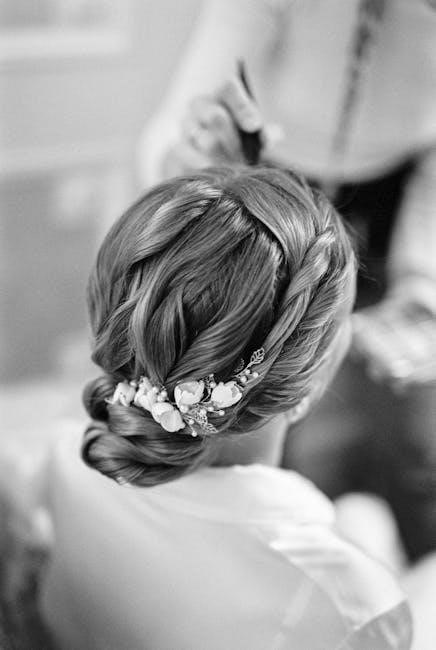
Waterfall Plait: Achieving a Delicate Style
The waterfall plait is a visually stunning braid that creates the illusion of cascading hair, resembling a waterfall. It’s a variation of the French braid, but instead of incorporating all strands, some are dropped to create the “falling” effect.
Begin with a section of hair at the crown and start a standard French braid for a few stitches. Then, when you would normally incorporate a new strand, simply drop it, letting it fall freely. Pick up a new strand from below to continue the braid.
Maintaining even tension and consistently dropping strands are crucial for a clean waterfall effect.
This style works best on layered hair, allowing the dropped strands to blend seamlessly. Secure the end with a clear elastic. Practice makes perfect – it may take a few attempts to master!
Maintaining and Caring for Plaits
Proper care extends plait lifespan and hair health. Regular moisturizing, scalp care, and protective styling are essential for longevity and preventing breakage.
Gentle removal is key!
How Long Do Different Plaits Last?
Plaits’ longevity varies significantly based on style and maintenance. Simple three-strand plaits, when done on one’s own hair, typically last a day or two, ideal for temporary styles.
However, more intricate braided styles, like cornrows or box braids, can last much longer – often between two to eight weeks with proper care. Factors influencing duration include hair texture, braid tightness, and individual hair growth rate.
Box braids, particularly when using extensions, can potentially last even longer, but maintaining scalp health becomes crucial to prevent discomfort or damage. Regularly moisturizing the scalp and braids, and wearing a satin bonnet at night, will maximize their lifespan.
Ultimately, listening to your hair and addressing any signs of tension or irritation is paramount.
Proper Hair Care for Braided Hair
Maintaining braided hair requires a dedicated routine to ensure both style longevity and scalp health. Regularly cleanse the scalp with a diluted shampoo, gently massaging to remove buildup without disrupting the braids.
Moisturizing is key; apply a lightweight oil or leave-in conditioner to both the braids and scalp to prevent dryness and breakage. Protecting your braids at night with a satin scarf or bonnet minimizes friction and maintains moisture.
Avoid heavy products that can cause buildup and attract lint. Listen to your scalp – if itching or irritation occurs, address it promptly with a soothing oil or scalp treatment.
Consistent care extends the life of your braids and promotes healthy hair growth underneath.
Removing Plaits Safely and Effectively
Removing braids improperly can lead to breakage and damage, so patience is crucial. Begin by gently loosening the braids at the ends, avoiding forceful pulling.
Using a small amount of oil or detangling spray can help to lubricate the hair and ease the removal process. Carefully unravel each braid, section by section, taking your time to avoid snagging.
Once all braids are removed, detangle the hair thoroughly with a wide-tooth comb, starting from the ends and working your way up to the roots.
Follow up with a deep conditioning treatment to restore moisture and strengthen the hair. Prioritize gentle handling throughout the entire process to minimize damage.
Resources for Further Learning
Numerous online tutorials, websites like Luxy Hair, and books – including “Hair Braiding for Beginners” – offer comprehensive guidance and inspiration for all skill levels.
Online Tutorials and Websites
The internet is brimming with fantastic resources for aspiring plaiters! YouTube channels offer a wealth of visual learning, with step-by-step tutorials covering everything from the basic three-strand braid to complex styles like Dutch and French plaits. Specifically, channels demonstrate techniques for complete beginners, ensuring a smooth learning curve.
Websites like Luxy Hair provide detailed guides and inspiration, showcasing various braid styles and offering helpful tips. Instructables features user-submitted projects, including hair braiding guides, fostering a community-based learning environment. Amazon hosts books like “Hair Braiding for Beginners,” providing structured lessons and visual aids. These platforms cater to diverse learning preferences, making mastering the art of braiding accessible to everyone, regardless of experience.
Books and Courses on Plaiting
For a more structured learning experience, several books offer comprehensive guides to plaiting techniques. Titles like “Hair Braiding for Beginners” by Sandra Kelley provide detailed tutorials for various braid styles, including cornrows, box braids, and Dutch braids. These books often include visual aids and step-by-step instructions, making them ideal for visual learners.
While dedicated online courses are less prominently featured in readily available information, the detailed content within these books effectively serves as a self-paced course. Amazon serves as a key platform for accessing these resources. Exploring local beauty schools or workshops may also reveal in-person plaiting courses, offering personalized instruction and hands-on practice. These resources cater to those seeking a deeper understanding and mastery of braiding skills.
Be First to Comment