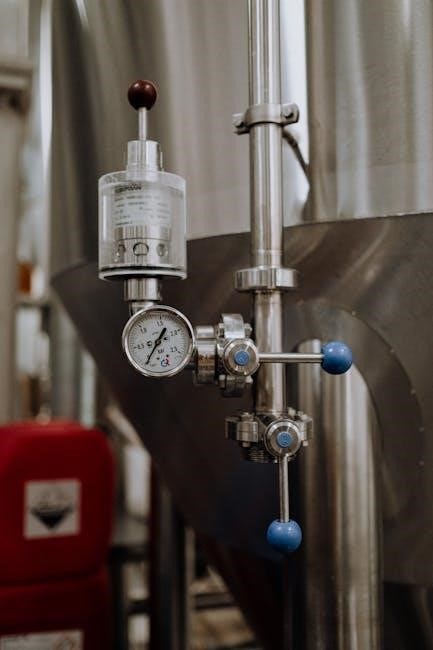
Aeromotive fuel pressure regulators are high-performance components designed for both EFI and carbureted systems, offering precise control over fuel pressure. Known for their durability and adaptability, these regulators ensure consistent fuel delivery, making them ideal for street and racing applications. Their adjustable base pressure feature allows customization to meet specific engine requirements, providing reliability and efficiency in various driving conditions.
Overview of Aeromotive Regulators
Aeromotive fuel pressure regulators are designed for high-performance applications, supporting both EFI and carbureted systems. They feature adjustable base pressure, typically ranging from 3 to 20 PSI, ensuring compatibility with various engine setups. These regulators are built with durability in mind, offering consistent fuel delivery in street, strip, or racing conditions. Their compact design and multiple port configurations make them versatile for different fuel system requirements, providing precise control over fuel pressure to optimize engine performance and reliability.
Key Features of Aeromotive Regulators
Aeromotive regulators are engineered with multiple 3/8 NPT inlet/outlet ports and a bypass port, ensuring versatility in fuel system configurations; They feature AN-style fittings with o-rings for leak-free connections, eliminating the need for thread sealant on these ports. The regulators are built with high-quality materials for durability and reliability, even in extreme conditions. Their compact design and adjustable base pressure capability make them suitable for both street and racing applications, providing precise fuel pressure control for optimal engine performance.

Pre-Installation Considerations
Before installing an Aeromotive regulator, ensure proper thread sealant is used on NPT ports and verify compatibility with your vehicle’s fuel system configuration and requirements.
Understanding the Regulator Ports and Fittings
Aeromotive regulators feature multiple ports for inlet, outlet, and bypass functions. The regulator includes 3/8 NPT inlet/outlet ports and a 3/8 NPT bypass port, all requiring thread sealant like Loctite 565. Additionally, three 1/8 NPT gauge ports are provided for attaching a fuel pressure gauge. Ensure proper adapter fittings and high-pressure fuel lines are used for compatibility. Note that certain ports may require specific AN-style fittings without thread sealant. Always refer to the installation manual for precise part number specifications and configuration details.
Choosing the Right Location for Installation
Selecting the ideal location for your Aeromotive regulator is crucial for optimal performance and safety. Mount the regulator in the engine compartment, away from direct heat sources like exhaust manifolds or turbochargers. Use the supplied mounting bracket as a template to mark and drill holes for secure installation. Ensure the regulator is easily accessible for future adjustments and maintenance. Avoid areas prone to moisture or extreme vibrations to prevent damage. Proper placement ensures reliable fuel pressure control and minimizes the risk of component failure during operation.

Step-by-Step Installation Guide
A step-by-step guide ensures a methodical approach to installing the Aeromotive regulator, covering removal of the old unit, secure mounting, and precise fuel line connections.
Removing the Existing Regulator
Begin by placing shop towels around the existing regulator to catch any spilled fuel. Disconnect the fuel lines and remove the mounting hardware. Carefully lift the old regulator from the fuel rail, ensuring no residual fuel is spilled. This step is crucial for a clean and safe installation process. Properly dispose of the old regulator and prepare the area for the new Aeromotive unit. Always refer to the vehicle’s service manual for specific precautions when handling fuel systems.
Mounting the Aeromotive Regulator
Locate a suitable spot in the engine compartment for the Aeromotive regulator. Use the supplied mounting bracket as a template to mark the holes; Drill the holes to accommodate a 10-32 screw. Secure the bracket firmly, ensuring the regulator is level and accessible. Once mounted, apply light oil to the O-rings provided in the Aeromotive package to ensure a proper seal. This step is essential for a leak-free and stable installation, preparing the regulator for fuel line connections.
Connecting Fuel Lines and Fittings
Attach the fuel lines to the regulator using AN-10 style fittings for inlet and outlet ports. Ensure O-rings are properly seated for a leak-free connection. Apply thread sealant to all NPT ports, such as the 1/8 NPT port for the fuel pressure gauge. Connect the fuel rail outlet port to the regulator’s side ports, using AN-10 fittings for most applications. Double-check all connections for tightness and compatibility with your fuel system setup. Properly secured lines ensure reliable fuel flow and system performance.
Setting Up the Fuel Pressure Gauge
Attach the fuel pressure gauge to the 1/8 NPT port on the regulator. Use a 0-100psi gauge for accurate pressure monitoring. Ensure thread sealant is applied for a leak-free connection.
Attaching the Fuel Pressure Gauge
To attach the fuel pressure gauge, locate the 1/8 NPT port on the Aeromotive regulator. Use a 0-100psi gauge (part 15633) for accurate pressure monitoring. Apply thread sealant, such as Loctite 565, to the port threads to ensure a leak-free connection. Securely attach the gauge, ensuring it is tightly fitted to prevent any fuel leaks. This setup allows for precise monitoring of fuel pressure, essential for optimizing engine performance and maintaining proper system functionality.
Calibrating the Gauge for Accuracy
Calibrate the fuel pressure gauge by first setting the regulator to its base pressure. Use a precision pressure gauge to verify accuracy. Ensure the regulator is at rest (engine off) to avoid fluctuations. Compare the readings and adjust the gauge as needed for consistency. Proper calibration ensures accurate fuel pressure monitoring, which is critical for engine performance. Refer to the Aeromotive instructions for specific adjustment procedures to maintain precise control over fuel delivery pressures in your system.

Adjusting the Base Fuel Pressure

Adjusting the base fuel pressure on an Aeromotive regulator involves setting the initial pressure with the engine off. Turn the adjustment screw to achieve the desired pressure, typically between 3-20 PSI, ensuring proper fuel delivery for your specific application.
Understanding Base Pressure Adjustment
Base pressure adjustment on Aeromotive regulators sets the initial fuel pressure with the engine off. This pressure is crucial for ensuring proper fuel flow and engine performance. The regulator allows adjustments between 3-20 PSI using a spring-loaded adjustment screw. Turning the screw clockwise increases pressure, while counterclockwise decreases it. It’s vital to consult the vehicle’s specifications to determine the correct base pressure, ensuring optimal fuel delivery and preventing engine damage. Proper adjustment guarantees reliability and efficiency in various driving conditions.
Setting the Pressure for Your Application
Set the Aeromotive regulator’s pressure according to your engine’s specifications. For carbureted engines, a lower PSI (e.g., 7-10) is typically required, while EFI systems often need higher pressures (e.g., 40-50 PSI). Adjust the regulator by turning the spring-loaded screw clockwise to increase pressure or counterclockwise to decrease it. Always reference your vehicle’s manual for precise settings. Proper pressure ensures optimal fuel flow, prevents leaks, and avoids engine damage. Fine-tune the pressure with the engine running and a fuel pressure gauge connected to verify accuracy.
Troubleshooting Common Issues
Common issues with Aeromotive regulators include leaks at port connections and improper pressure settings. Check all fittings for tightness and ensure thread sealant is applied correctly. If pressure fluctuations occur, verify the gauge accuracy and adjust the regulator as needed. Addressing these issues promptly ensures reliable fuel system performance and prevents potential engine damage.
Identifying Leaks and Sealant Requirements
Leak detection starts with inspecting all connections for fuel seepage or dampness. Ensure thread sealant, like Loctite 565, is correctly applied to NPT ports. Check o-rings for wear and proper seating, as damaged ones can cause leaks. Verify that AN-10 style fittings are used without thread sealant on o-ring sealed ports. Regularly clean the regulator area to spot issues early. Replace worn o-rings and ensure all fittings match Aeromotive specifications. Consult official documentation for precise troubleshooting and maintenance guidance to prevent and address leaks effectively.
Addressing Performance-Related Concerns
Performance issues often arise from incorrect base pressure settings or improper fuel line sizing. Ensure the regulator is adjusted to match your engine’s requirements, typically between 3-20 PSI. Verify that AN-10 fittings are used for optimal flow rates. If using a pressure gauge, check its accuracy and connection to the 1/8 NPT port. Minor leakage at the bypass port is normal and does not affect performance. Always refer to the official Aeromotive documentation for specific adjustments and troubleshooting steps tailored to your application.
Maintenance and Upkeep
Regularly inspect O-rings and seals for wear. Clean or replace components as needed to maintain optimal performance and prevent leaks. Use thread sealant on all ports.
Regular Inspection of O-Rings and Seals
Inspect O-rings and seals regularly for signs of wear, cracking, or leakage. Replace any damaged components promptly to ensure proper sealing and prevent fuel leaks. Use thread sealant on all NPT ports during reinstallation. Clean the regulator and surrounding areas to avoid contamination. Always follow the manufacturer’s guidelines for replacement parts and maintenance schedules to maintain optimal performance and reliability of the Aeromotive regulator.
Cleaning and Replacing Worn Components
Clean the regulator and its components regularly to ensure optimal performance. Use a soft-bristle brush and mild solvent to remove dirt and debris. Inspect all O-rings, seals, and fittings for wear or damage. Replace any worn parts with genuine Aeromotive components to maintain reliability. When reassembling, apply a light coat of oil to O-rings and use thread sealant on NPT ports. Ensure all connections are secure and properly tightened to prevent leaks. Follow the manufacturer’s guidelines for replacement intervals and cleaning procedures to maintain the regulator’s efficiency and longevity.
For detailed guidance, refer to Aeromotive’s official documentation, available as a PDF download. Search by part number for specific installation and maintenance instructions, ensuring optimal performance and reliability.
Final Check and Test Drive
After completing the installation, perform a final inspection to ensure all connections are secure and properly sealed. Start the engine and monitor the fuel pressure gauge to confirm accurate readings. Check for any signs of leaks around fittings and ports. Once verified, take the vehicle for a test drive under normal operating conditions to ensure stable fuel pressure and optimal performance. This step ensures the regulator functions correctly and meets your engine’s demands, providing peace of mind and reliable operation.
Accessing Official Aeromotive Documentation
For detailed instructions and specifications, visit Aeromotive’s official website to download the latest PDF guides. Use the search function to find your specific part number and access comprehensive installation manuals. These resources provide step-by-step instructions, diagrams, and technical details to ensure proper setup and operation. Official documentation is essential for troubleshooting and maintaining your Aeromotive regulator, ensuring optimal performance and reliability in your fuel system.

Be First to Comment